
Understanding Pod Evictions: Why Kubernetes Removes Your Pods And How To Prevent It
S
DevOps & Cloud Engineer — building scalable, automated, and intelligent systems. Developer of sorts | Automator | Innovator
Search for a command to run...
DevOps & Cloud Engineer — building scalable, automated, and intelligent systems. Developer of sorts | Automator | Innovator
Artificial Intelligence has become one of the biggest talking points in software engineering. Every week, a new tool promises to automate deployments, fix production incidents, or replace developers a
You spin up a Kubernetes workload. You connect to PostgreSQL. You add sslmode=require because security matters. And then PostgreSQL replies with: server does not support SSL, but SSL was required Wai
When you first approach Tencent Cloud, it feels familiar if you come from AWS or Azure. There are VPCs, Kubernetes clusters, load balancers, object storage, IAM, everything you would expect. But once

When I first automated Docker builds and deployments, I thought the hard part would be writing the YAML. It was not. The real challenges were versioning, preventing accidental rollbacks, handling envi
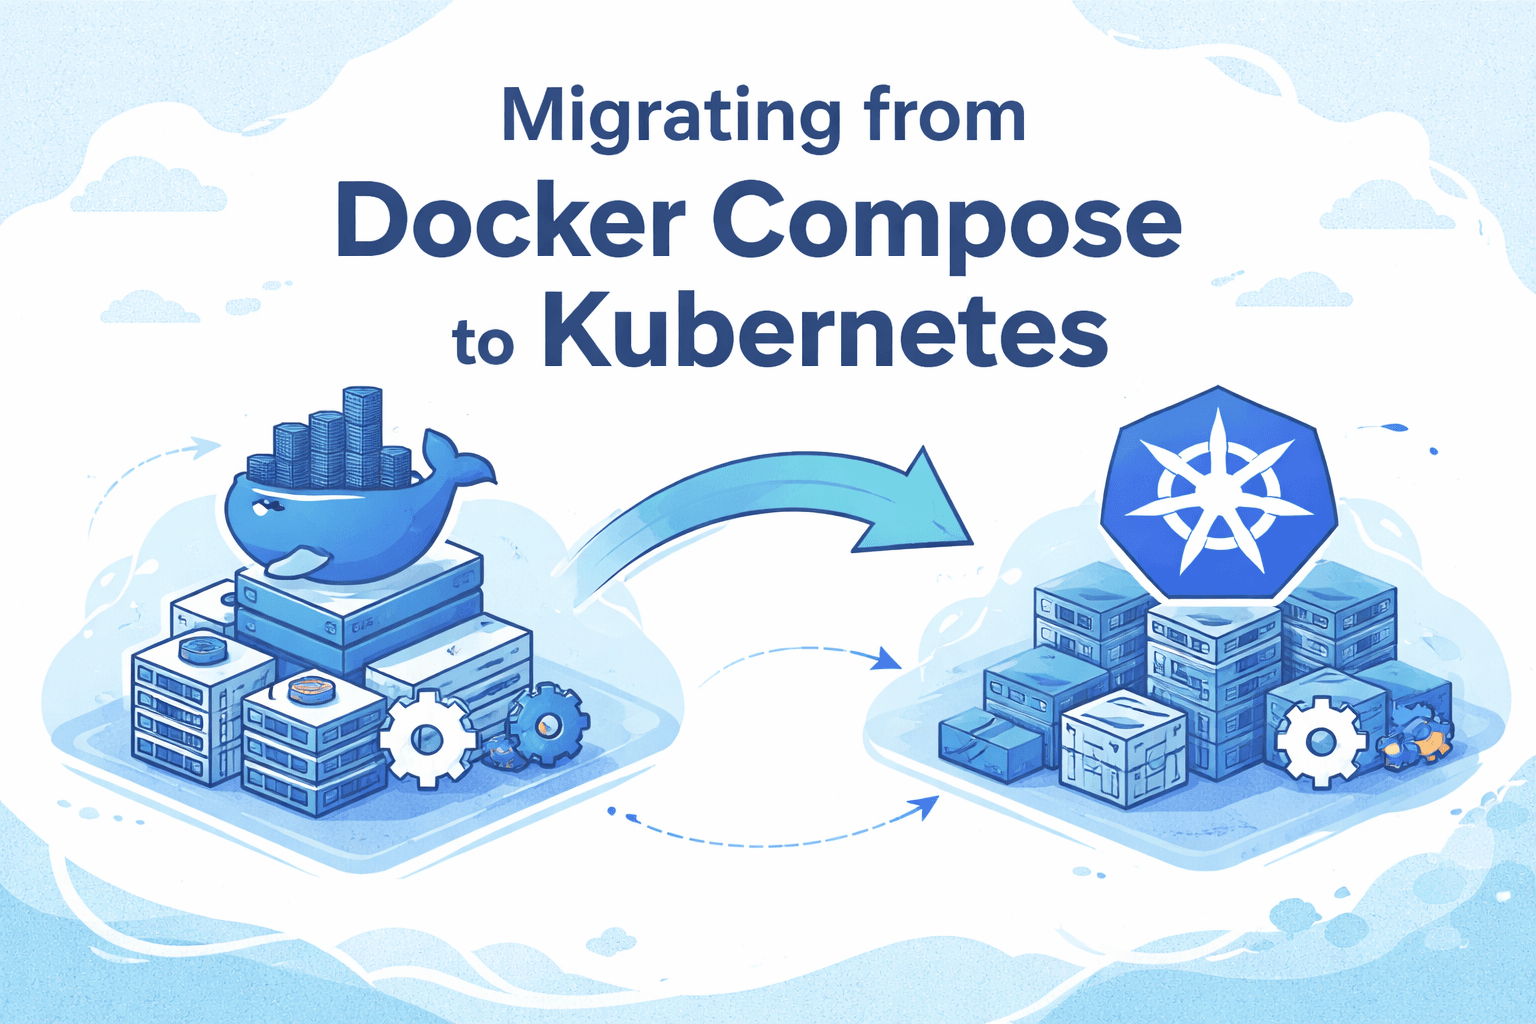
For a long time, Docker Compose felt like the perfect solution. Simple YAML, fast local setup, predictable behavior. For a single service or even a small stack, it works beautifully. But at some point, reality catches up. As the application grew, tra...
CodeOps Studies
40 posts
Simple write-ups on day to day code or devops experiments, tests etc.
Running applications on Kubernetes usually feels smooth and stable until one day a pod suddenly disappears. Kubernetes calls this process eviction, and it happens when the cluster decides that removing a pod is the safest way to protect the node or the rest of the workload. Pod evictions can feel mysterious at first, especially when they occur during heavy traffic or during important workloads. Fortunately, Kubernetes eviction patterns are predictable once you understand what triggers them and how to prevent them.
This guide explains why pod evictions happen, how to identify the root cause, and the practical steps you can follow to keep your pods running reliably. Everything is supported with real Kubernetes commands, YAML examples, and explainers that make the entire topic easy to apply in your own cluster.
A pod eviction happens when the Kubernetes control plane removes a pod from a node because the node is under pressure. This is not the same as a pod crashing. Eviction is a deliberate decision taken by Kubernetes to protect node stability.
When an eviction happens, you will usually see events such as:
The node had disk pressure
The node had memory pressure
The node had PID pressure
The node was unreachable
Evicting Pod due to node condition
Pods that are part of a deployment will be recreated on another node, but single node clusters or clusters with insufficient resources often suffer downtime as a result.
Although Kubernetes can report several types of pressure, these three are the most common causes.
This is the most frequent reason for evictions. When a node runs out of memory, Kubernetes starts removing pods that exceed their memory requests or pods with lower priority.
Common signs:
Eviction messages mentioning memory pressure
OOMKilled events
Node metrics showing high memory usage
This happens when the node runs low on either free disk space or free inodes. Logging, large ephemeral storage usage, container images, and runaway volumes often cause this.
Signs include:
Events mentioning disk pressure
Eviction messages citing low disk availability
This occurs when a node runs out of process identifiers. Too many running processes or certain badly designed sidecars can trigger this.
Events provide the first clue. Run:
kubectl get events --sort-by=.lastTimestamp
Evicted pods usually report messages like:
Evicted Pod         The node had memory pressure
Evicted Pod         The node had disk pressure
Even after eviction, the history remains:
kubectl describe pod <pod-name> -n <namespace>
Look for the “Status” and “Last State” sections. They usually contain a reason such as:
Reason: Evicted
Message: The node had memory pressure
Nodes show their pressure state clearly:
kubectl describe node <node-name>
You might see conditions like:
MemoryPressure   True
DiskPressure     True
PIDPressure      False
Kubernetes follows a predictable order when choosing which pods to evict.
Pods with higher priority are protected. Lower priority pods face eviction first.
Example of a priority class:
apiVersion: scheduling.k8s.io/v1
kind: PriorityClass
metadata:
  name: critical-service
value: 100000
globalDefault: false
description: "Critical system components"
Use it in a pod or deployment:
spec:
  priorityClassName: critical-service
Pods that request low memory but actually use much more are frequent eviction targets. Kubernetes tries to preserve pods that are within their declared requests.
One of the strongest defenses against eviction is correct sizing. A pod that consumes far more memory than it requests will be evicted during memory pressure.
Example:
resources:
  requests:
    cpu: "200m"
    memory: "512Mi"
  limits:
    cpu: "500m"
    memory: "1Gi"
Requests tell Kubernetes how much the pod needs to run reliably. If these numbers are too low, Kubernetes will treat the pod as a low priority candidate for eviction.
In shared namespaces, this prevents runaway pods from disrupting others:
apiVersion: v1
kind: LimitRange
metadata:
  name: default-limits
spec:
  limits:
  - type: Container
    defaultRequest:
      memory: 256Mi
      cpu: 100m
Critical workloads deserve higher protection, especially in clusters with limited nodes.
Overcommitting CPU is safe, but overcommitting memory is dangerous. Pods will be removed during memory pressure, even if your deployment expects them to stay alive.
Disk pressure is often caused by:
Large logging output
Growing emptyDir volumes
Too many container images on the node
Use log rotation or a logging agent with proper configuration.
In managed Kubernetes like AKS or EKS, enabling cluster autoscaling significantly reduces unwanted evictions because new nodes appear when pressure increases.
Imagine a cluster using a single Standard D3 class VM. Under heavy traffic, one of your application pods disappears. The event log shows:
Evicted: The node had memory pressure
Next steps:
kubectl describe node <node-name>
Output:
MemoryPressure True
You notice the pod requests only 128Mi but uses over 800Mi during traffic spikes. The node cannot allocate enough memory, so Kubernetes removes the pod.
Update the deployment with realistic memory requests.
resources:
  requests:
    memory: "512Mi"
  limits:
    memory: "1Gi"
Critical services can be protected with a higher priority.
Use Prometheus, Grafana, or Kubelet metrics to observe memory growth and make adjustments.
if you want to see why monitoring (and a minimal kubernetes loki setup) is very important, read my previous blog:
https://blog.nyzex.in/why-observability-is-the-unsung-hero-in-modern-cloud-applications
After this fix, the pod no longer gets evicted during traffic spikes.
Pod evictions are not random events. They are Kubernetes actively protecting your cluster from resource exhaustion. Once you understand the signals that trigger these evictions and how Kubernetes chooses which pods to remove, you can build workloads that are far more resilient.
By setting correct resource requests, monitoring node pressure, controlling logging and ephemeral storage, tuning pod priorities, and sizing nodes properly, you ensure that your critical applications continue running without interruption.